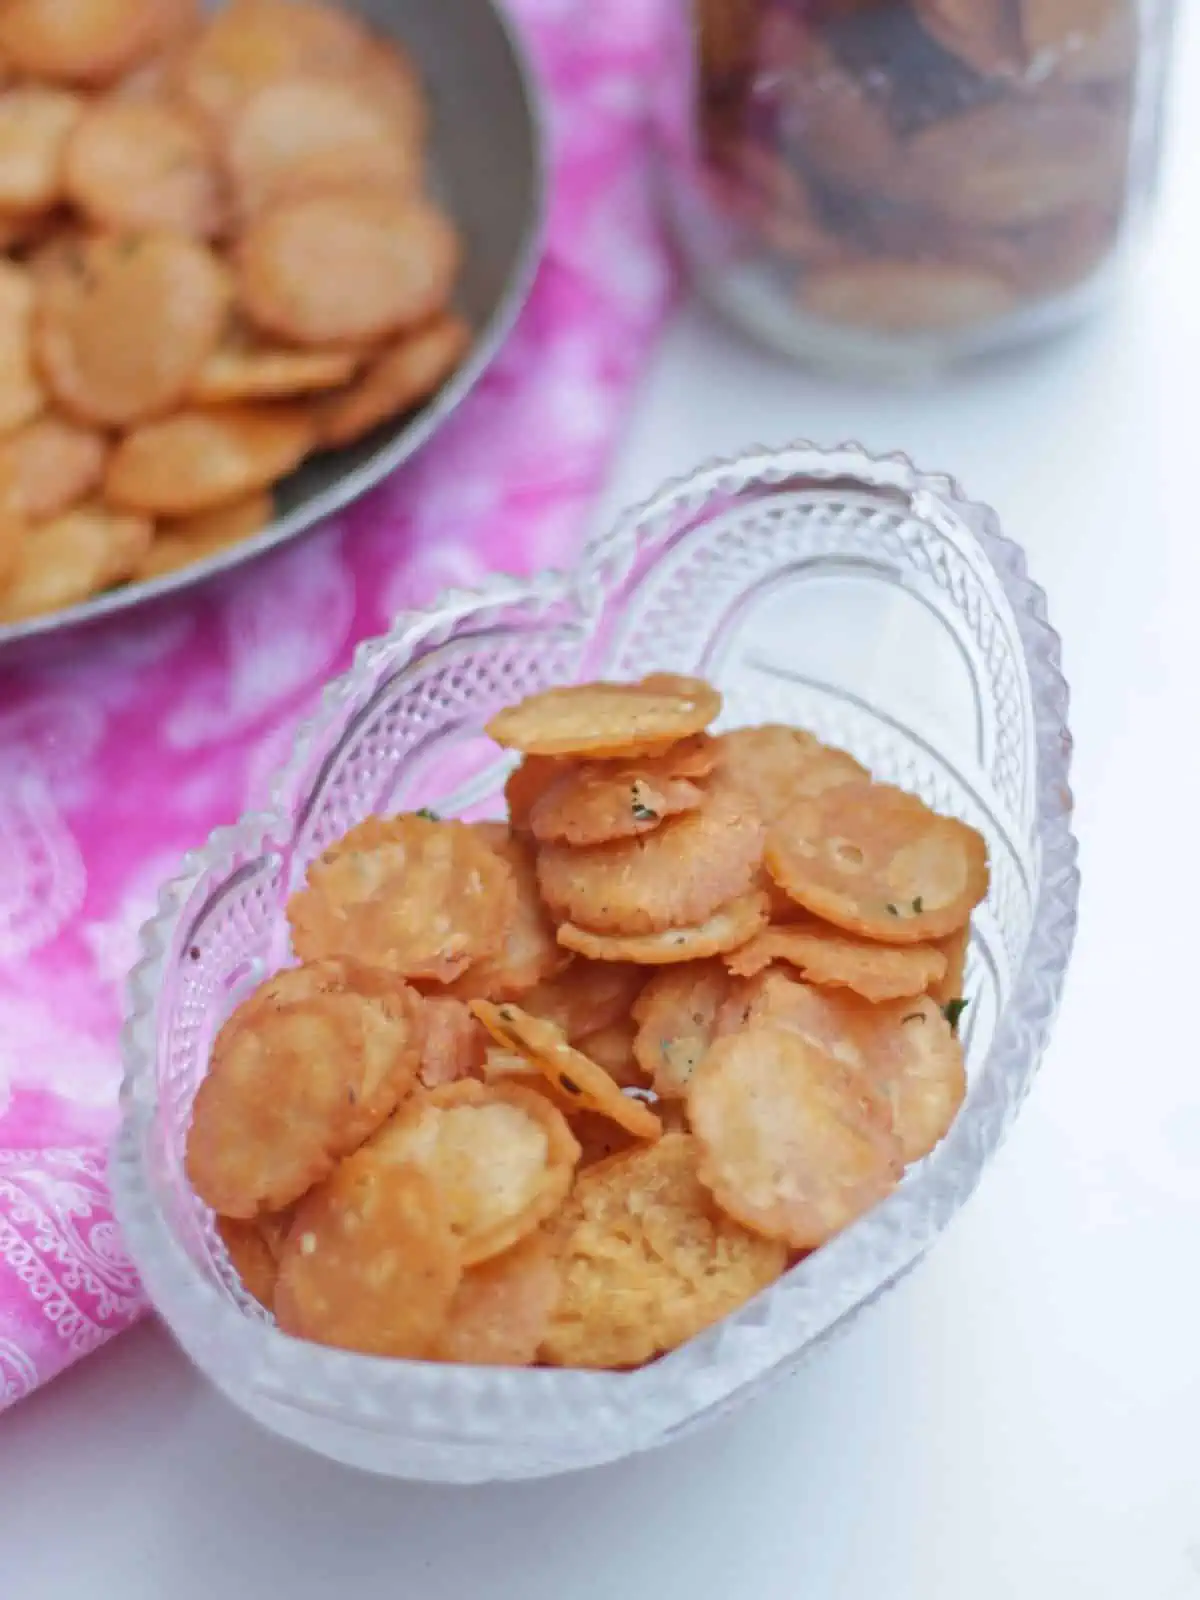
When looking for a quick and crispy snack, this Button Thattai is the best ever! This mini kara kara button thattai is perfect for carrying as an 'on-the-go snack' and kids or adults love it equally.
Summer vacation is in full swing and so is the constant demand for snacks. My older son is having a quiet summer before he leaves for college in the fall. On the other side, my younger one has a lot of tennis and music in his schedule. Home or traveling, vacation calls for plenty of snacks.
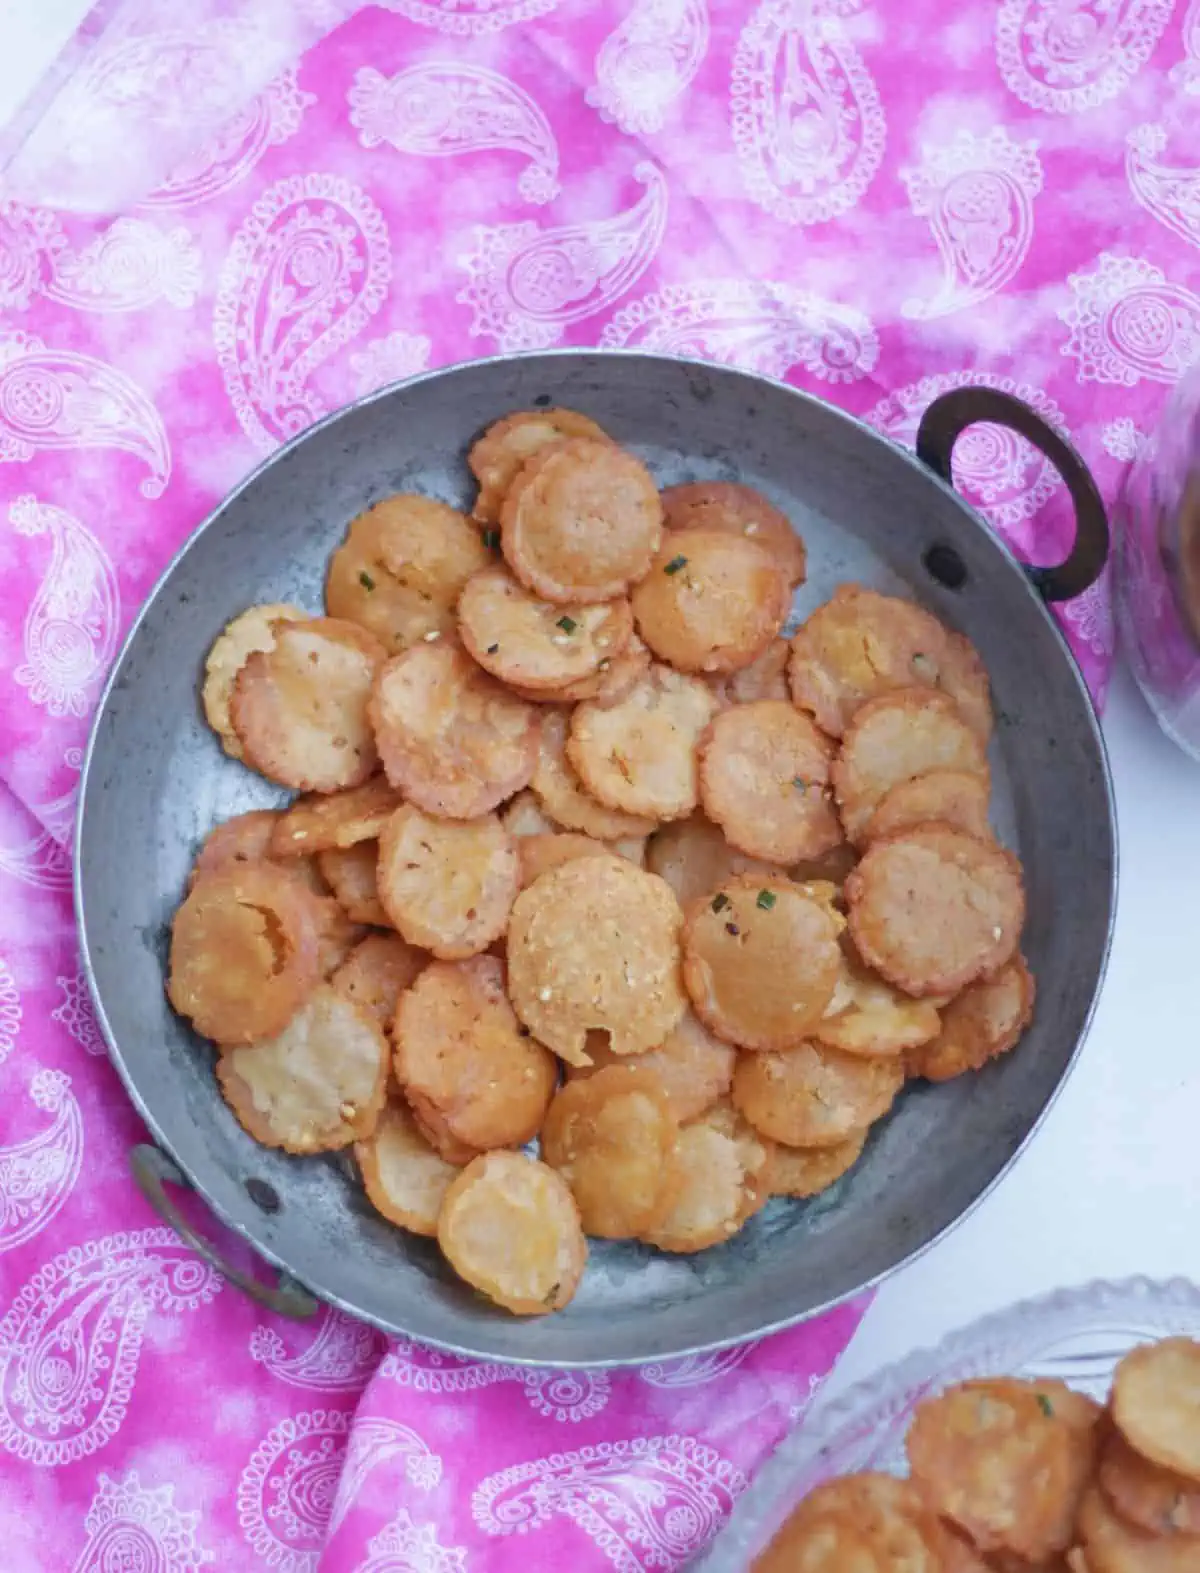
I have posted my traditional Thattai recipe which I make during Gokulashtami / Krishna Jayanthi and Diwali. After making these mini thattais, my boys have decided I will make them often instead of the regular ones as they are so much easier to eat.
These mini thattais which is often referred to as kara kara button (crispy button-like) and button thattai are very easy to make. This is also a unique recipe as it is made with cooked lentils along with rice flour.
Other than using cooked lentils instead of roasted gram flour (that I use in regular thattai recipe), the process to make the mini thattai is pretty similar. We make dough with rice flour, lentils, and spices. Make tiny balls and flatten them into discs and then fry them.
I am trying to follow in the footsteps of my aunts and grandmother and trying to stock the pantry with some delicious homemade snacks.
Why make button thattai?
- The number one reason I would make these mini thattais are that they are adorable.
- They are much easier to carry when traveling and are perfect as a 'to-go snack'.
- I love the addition of cooked lentils in this mini thattai. This adds a lovely flavor and also gives the thatta a melt-in-the-mouth texture.
- These are perfect for kids' snacks. If you have a toddler, it is much easier for them to pick and eat the button thattai.
- And when we are on a road trip, I find these mini thattais much easier to pack in snack bags.
Ingredients needed
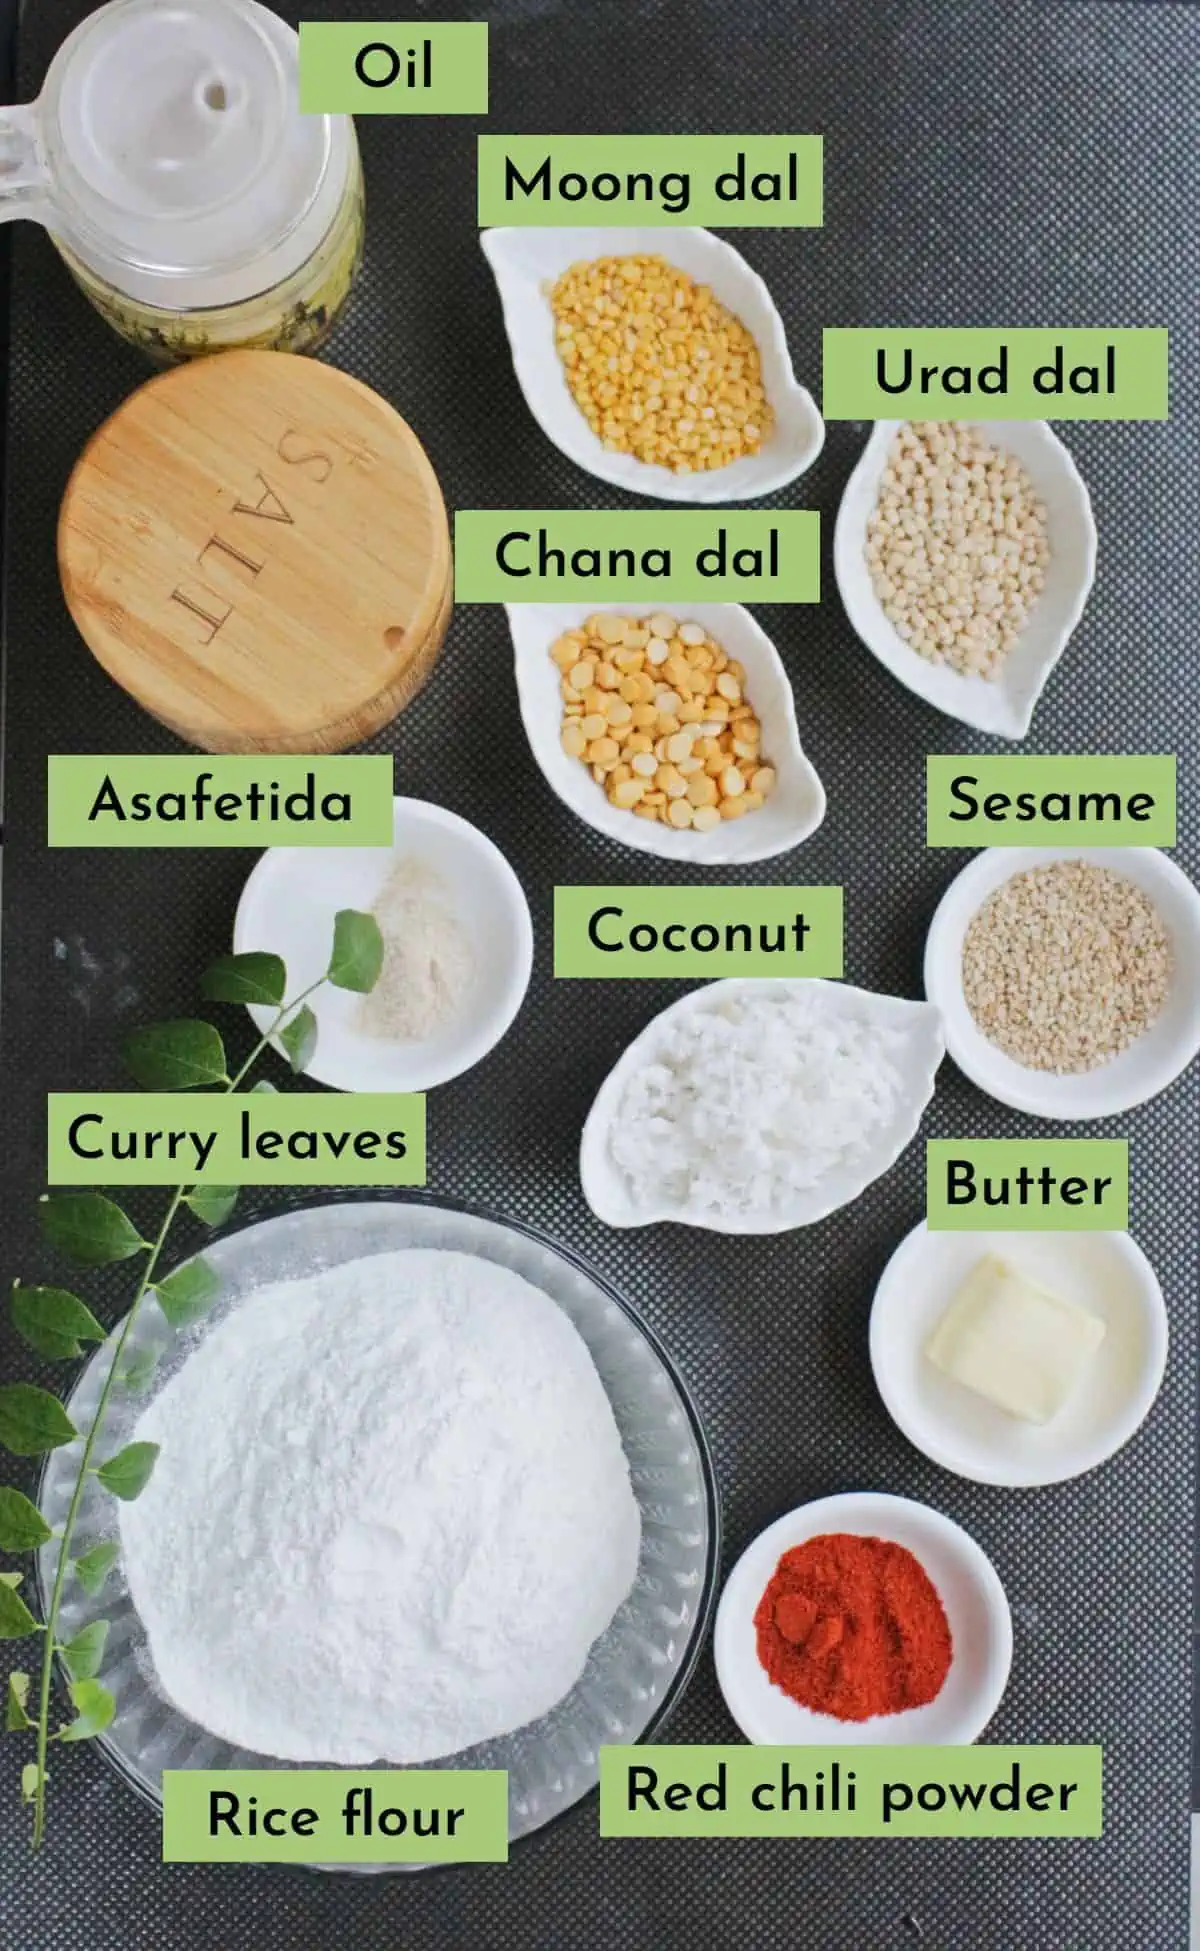
Check the recipe card at the bottom of the page for exact measurements and printable detailed recipes.
Rice flour - You could use store-bought rice flour or make your own homemade rice flour to make the button thattai. Rice flour can be easily found in Indian grocery stores. If not, they are very easy to make at home as well.
Lentils - We use a mixture of three lentils to make the kara kara button. I have used chana dal (kadalai paruppu), urad dal (ullutham paruppu) and moong dal (payatham paruppu). Some recipes use just moong dal, but I find more the lentils, more the flavor.
Spice powders - I have used red chili powder, asafoetida, and salt in the thattai dough.
Sesame seeds - I love the flavor of sesame seeds in savory snacks. In the min thattai though, I found that the sesame seeds fell out a lot when frying. So it is optional and you could skip using them.
Butter - A little butter is used in the thattai dough to give it a melt-in-the-mouth texture.
Additional add-ins - I added finely chopped curry leaves and also some grated coconut for added flavor. These are optional and can be skipped. Also, a few crushed peanuts could be added.
Oil - Use any oil that you would normally for deep frying. I use vegetable oil or canola oil to fry the button thattai. We could also use peanut oil.
Step-by-step process
Gather all the ingredients. If making rice flour at home, make sure to get it done the day before.
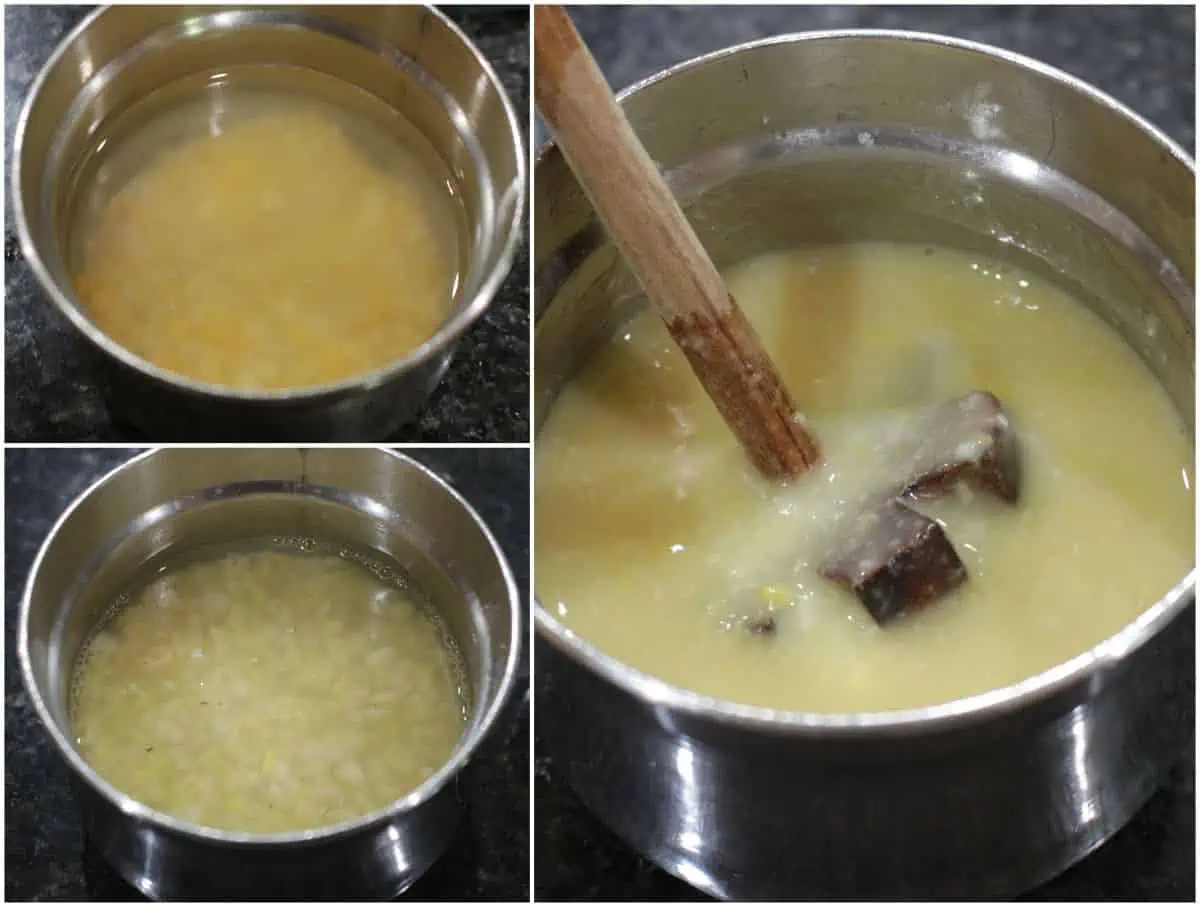
Combine the lentils in a small bowl and wash them well. Add about ½ cup of water and cook them in the pressure cooker or Instant Pot until soft and mushy. I cooked it on manual mode for about 12 minutes in the Instant Pot.
Once the lentils are cooked, remove them and mash them well. If you find excess water in the cooked lentil, drain it before mashing. Keep the excess water aside and we will use it when making the thattai dough.
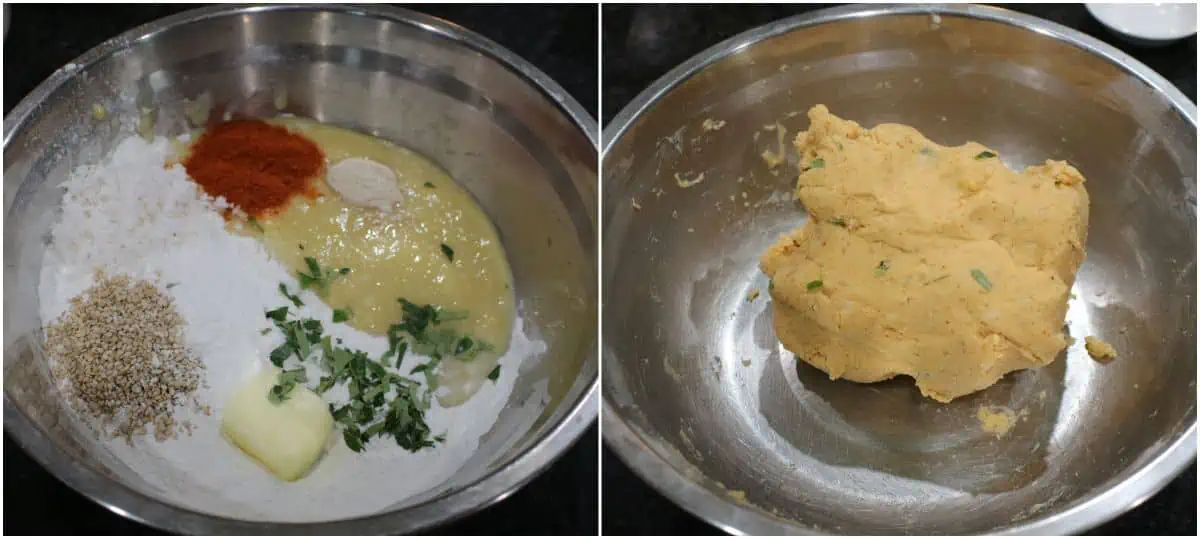
Making the dough for button thattai
In a wide bowl, add the rice flour, cooked and mashed lentils, spices, butter, sesame seeds, curry leaves, and grated coconut along with the salt needed.
Mix it well incorporating all the ingredients with your fingers. Now sprinkle water very slowly and make a stiff thattai dough. Use the saved water from cooking lentils (if you have any).
Cover the dough with a kitchen cloth until we heat oil to deep fry the kara kara mini thattais.
Since these mini thattais are a little time-consuming to shape (and we make a ton of them since they are tiny), I like to shape enough to fry for a couple of batches before I start frying.
Shaping the button thattai
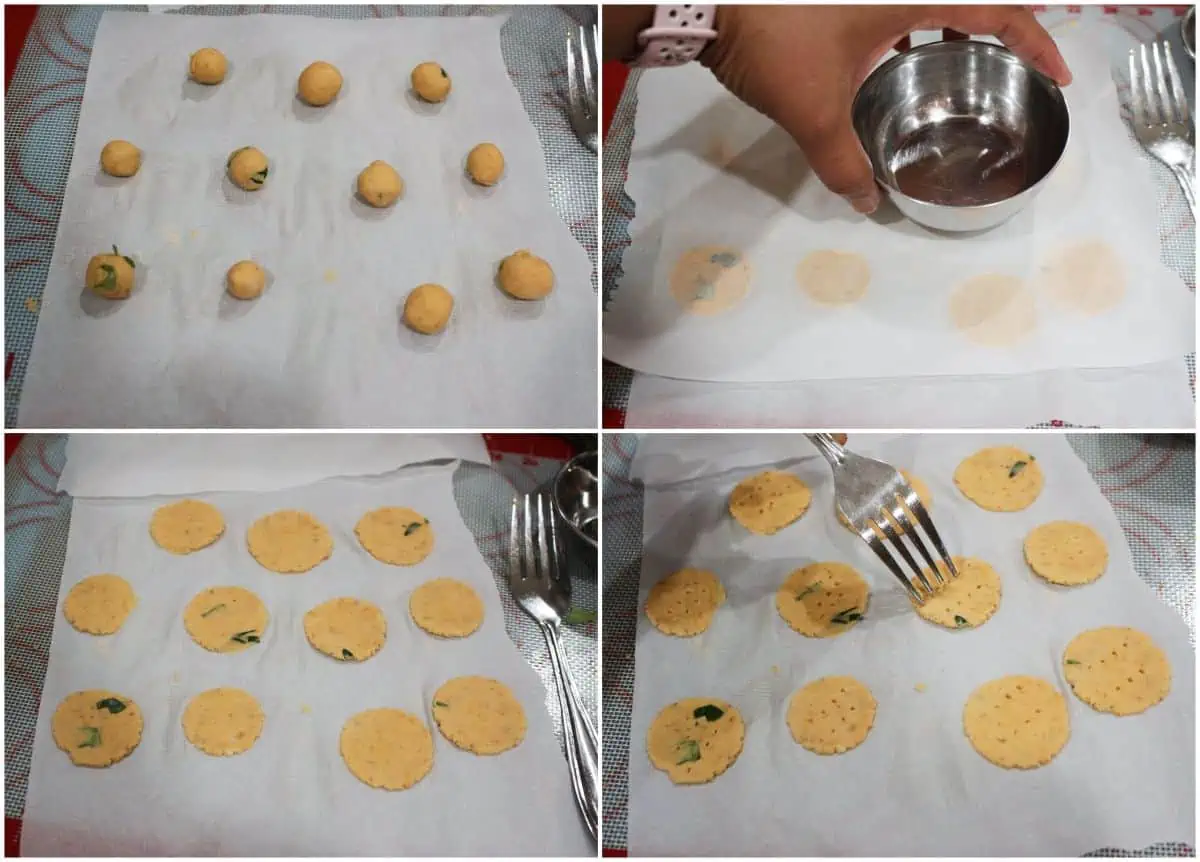
Make small balls from the thattai dough.
Layer a piece of parchment paper or a thick plastic paper on the countertop. Place the shaped balls on them leaving enough space between the balls to spread.
Now place another piece of parchment paper (or plastic) on top of the shaped balls.
Use a small flat bowl to gently press on each ball to flatten them. Make sure to flatten them evenly on all sides and also try to keep them the same size and thickness. I like it not too thin and not too thick.
Repeat with all the balls on the sheet. Use a fork and prick each disc a couple of times, so they don't puff up too much when frying.
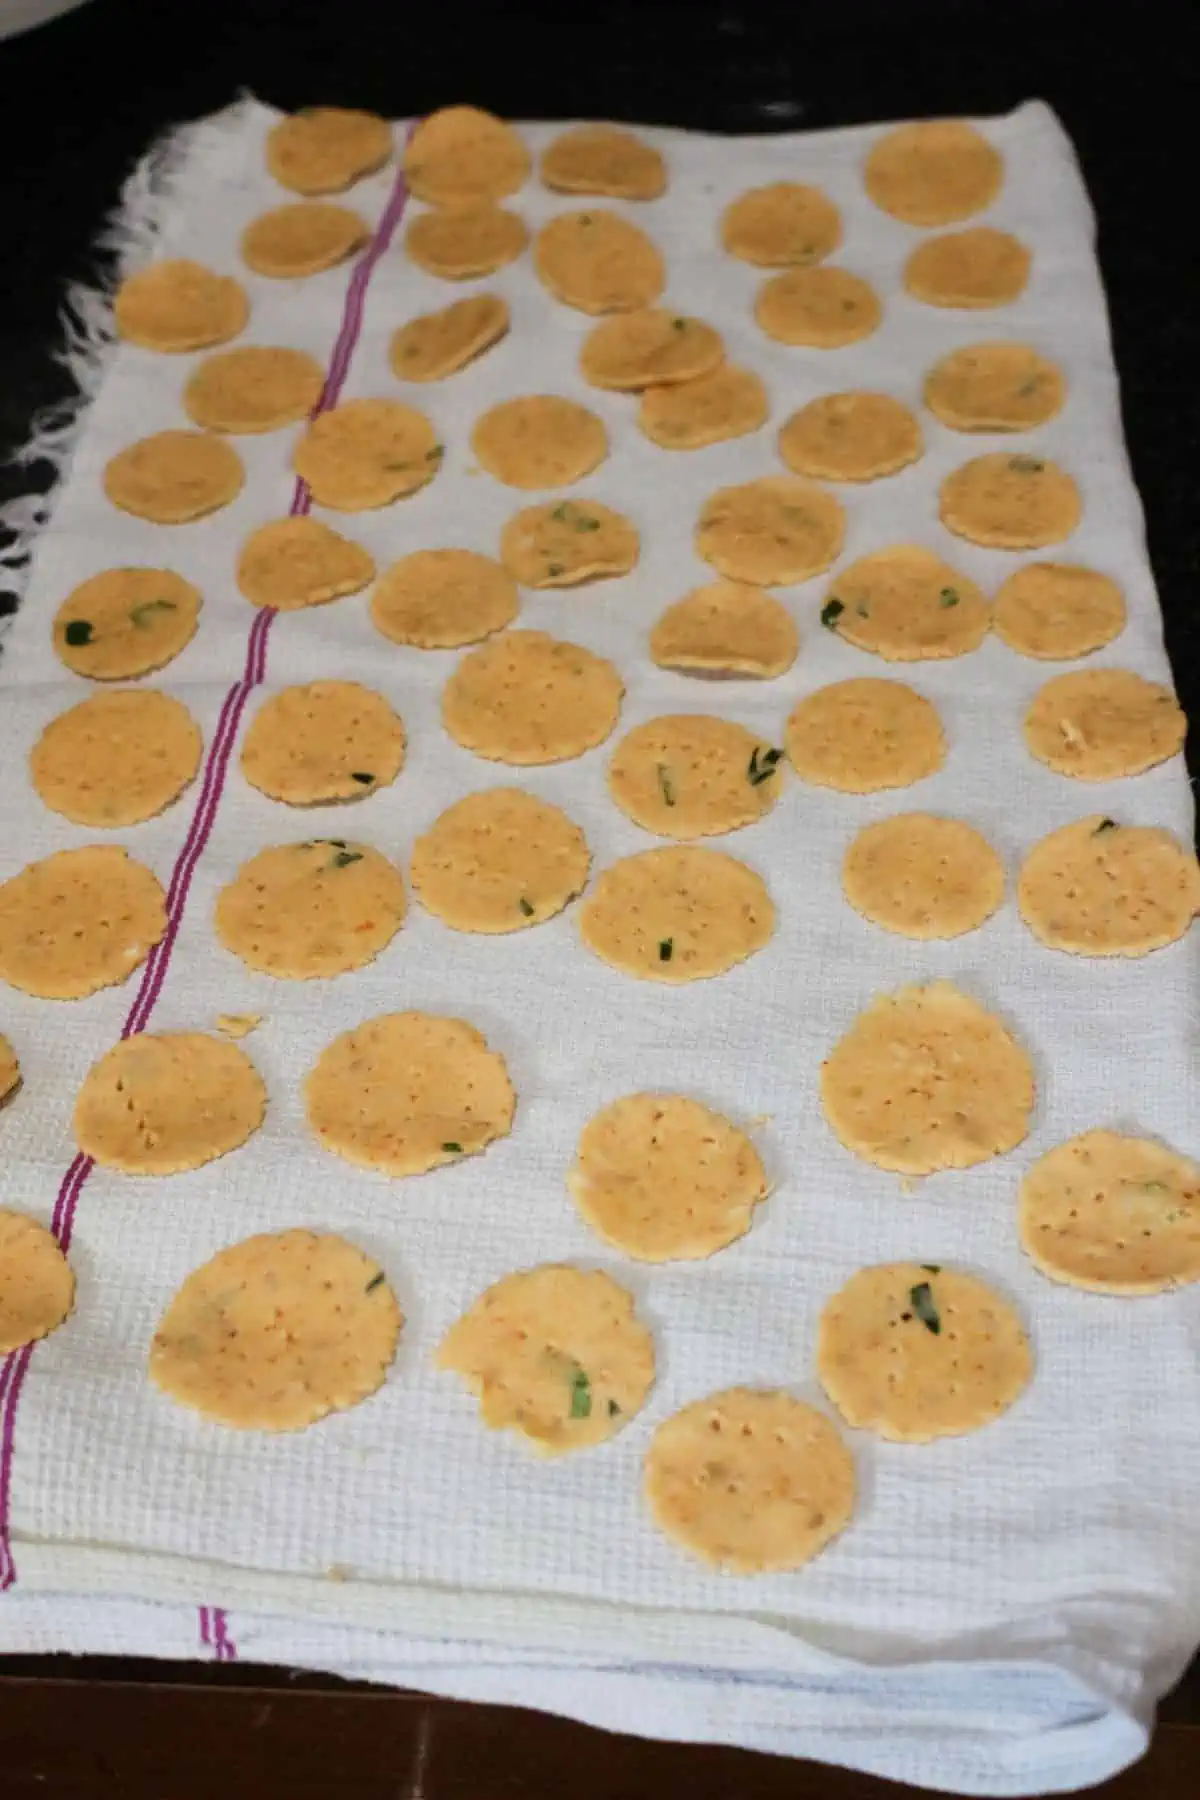
Slowly transfer the shaped thattai discs onto a clean kitchen cloth. I like using dhoti cloth/veshti to place the thattai disc.
Air drying them for a few minutes helps take the extra moisture from the dough and in turn the thattais comes out crispy and also absorbs less oil when frying.
Make 3 or 4 batches of thattai discs before beginning to fry them.
Frying the mini thattais
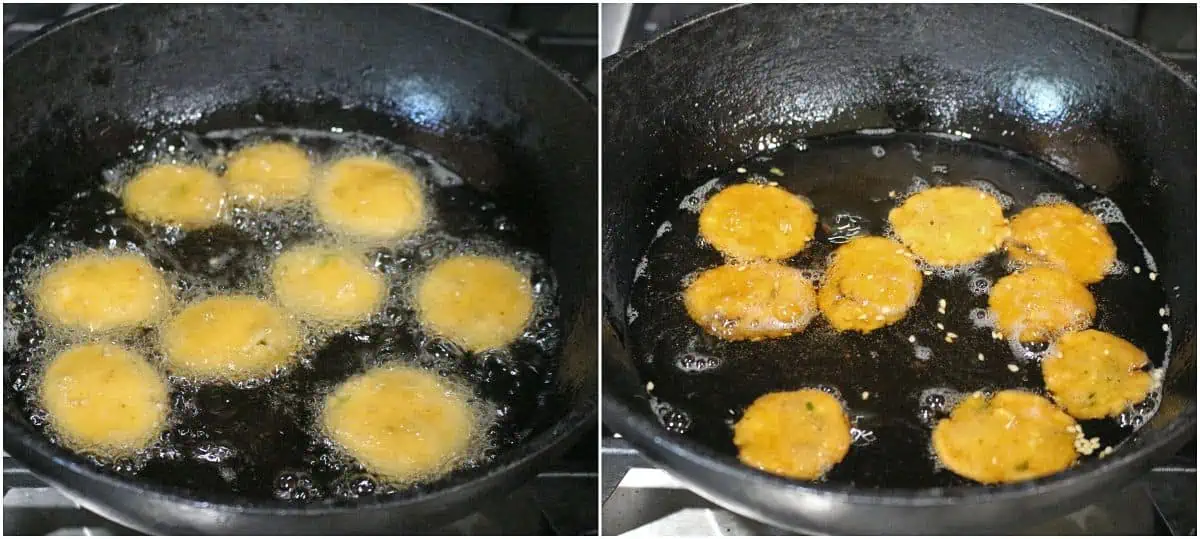
When the oil is hot, reduce the heat to medium and then slowly start sliding the shaped discs into the oil. Depending on the size of the frying pan, add about 8 to 10 mini thattais into the oil. Do not overcrowd.
Make sure to fry them on medium heat until the button thattais are golden brown on both sides.
Remove the kara kara thattai on a paper towel-lined bowl.
Let them cool well before transferring to an airtight container.
How to serve Button thattai
Button thattai is a wonderful evening snack along with coffee or tea. It is perfect as an after-school snack. My favorite is some cold Vietnamese coffee with this spicy kara kara thattai.
I love making mini thattais when we are planning a road trip. They are so convenient to pack and carry for the trip.
I also love to make it for festivals like Gokulashtami and Diwali.
How to store mini thattai
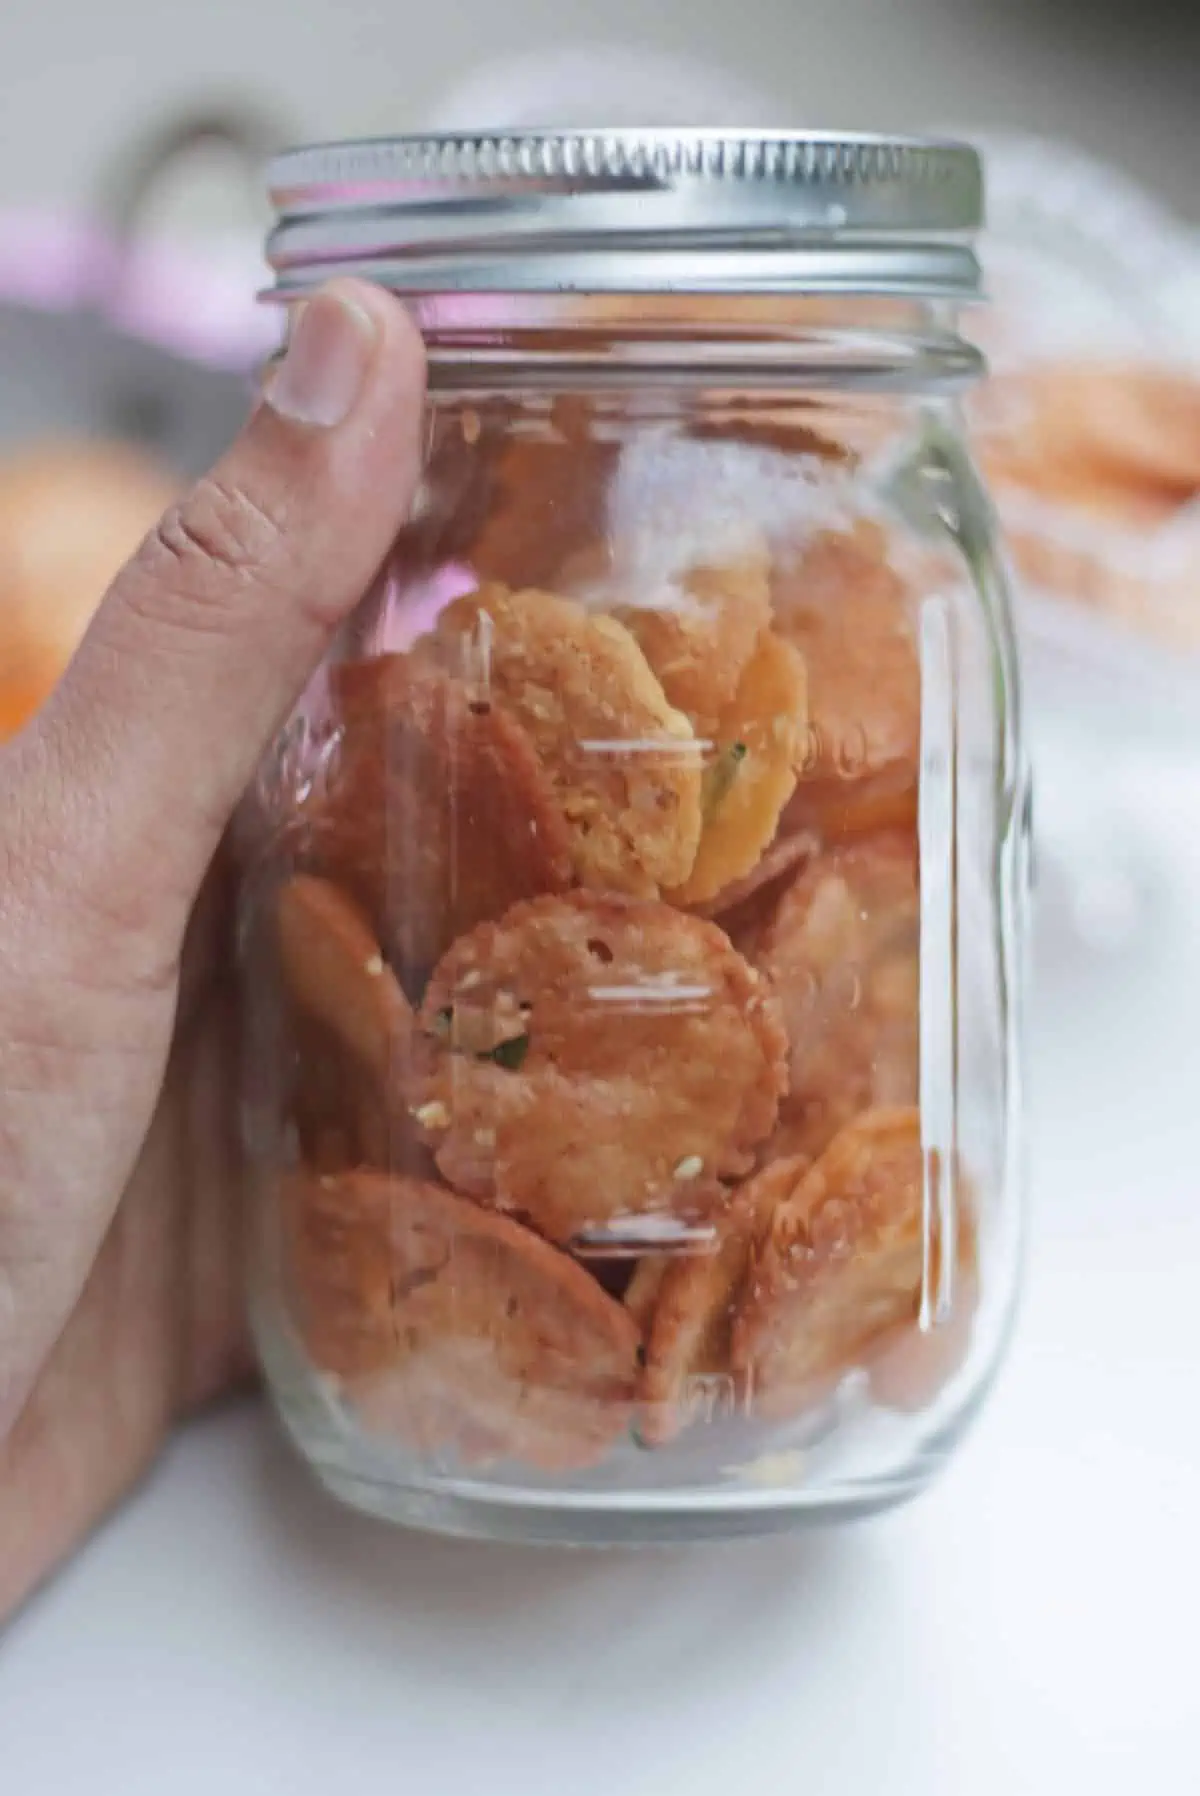
It is important to keep the thattai in an airtight container so they don't become soft. Let the thattai cool to room temperature and then we can store them in an air-tight stainless steel container or a glass jar.
I like to line the bottom of the container with a layer of paper towel. These thattais stay fresh at room temperature for up to 10 days.
Expert Tips
- Cook the lentils until they are soft. This way the lentil mixture will be smooth and combine well with the rice flour.
- Do not add more butter. This will make the button thattai too soft and disintegrate in oil.
- Make a few thattai discs before you start frying them. I found that since these thattais are tiny, they cook very quickly.
- Also, make sure to let the thattai discs air dry in a cotton cloth for a few minutes. I found that this way they did not absorb much oil when frying.
- Make the thattai disc even in thickness and size. This way they will fry uniform.
- The temperature of the oil is very crucial. Very hot oil can cause the thattai to darken too quickly and thattais will still be raw inside. If the oil temperature is too low, the oil will start to foam up and the thattai will soak up too much oil. So always keep the il temperature in medium heat.
Frequently asked questions
These are called button thattai because they are small as a button. We make it this way for ease of eating and packing. We could make them as a regular bigger size thattai as well.
The most common reason thattai disintegrates when frying is higher butter content. We can add a bit more rice flour and adjust the dough and try again.
Mini thattai needs to be deep-fried on medium heat. The thattai can still be soft when we fry them in high heat. The outside of the button thattai can change color but it will still remain soft inside.
I have seen recipes where we just use moong dal / payatham paruppu to make the kara kara thattai.
If you made this recipe and liked it, give a star rating on the recipe card or let me know in the comments below. You could also share it with me on Instagram using #MyCookingJourney and tagging me @sandhya.ramakrishnan. You could follow me and my recipes on Facebook |Instagram | Pinterest | twitter
More similar snack recipes
If you made this recipe and liked it, give a star rating on the recipe card or let me know in the comments below. You could also share it with me on Instagram using #MyCookingJourney and tagging me @sandhya.ramakrishnan. You could follow me and my recipes on Facebook |Instagram | Pinterest | twitter
Recipe Card
Recipe
Crispy Button Thattai | Kara kara Mini Thattai
Equipment
- Parchment paper or thick plastic paper
- Small bowl to make dough disc
- Pan tp deep fry
- bowl
- Instant pot or pressure cooker
Ingredients
- 1 cup Rice flour store bought or homemade
- 1 Tablespoon Chana dal / kadalai paruppu
- 1 Tablespoon Urad dal / ullutham paruppu
- 1 Tablespoon Moong dal / payatham paruppu
- 2 Tablespoon Grated coconut optional
- 1 teaspoon sesame seeds
- few Curry leaves
- ½ Tablespoon Butter
- 1 teaspoon Red chili powder
- ¼ teaspoon Asafetida
- To taste Salt
- Oil To deep fry
Instructions
- Gather all the ingredients. If making rice flour at home, make sure to get it done the day before.
- Combine the lentils in a small bowl and wash them well. Add about ½ cup of water and cook them in the pressure cooker or Instant Pot until soft and mushy. I cooked it on manual mode for about 12 minutes in the Instant Pot.1 Tablespoon Chana dal / kadalai paruppu, 1 Tablespoon Moong dal / payatham paruppu, 1 Tablespoon Urad dal / ullutham paruppu
- Once the lentils are cooked, remove them and mash them well. If you find excess water in the cooked lentil, drain it before mashing. Keep the excess water aside and we will use it when making the thattai dough.
Making the dough for button thattai
- In a wide bowl, add the rice flour, cooked and mashed lentils, spices, butter, sesame seeds, curry leaves, and grated coconut along with the salt needed.1 cup Rice flour, 2 Tablespoon Grated coconut, 1 teaspoon sesame seeds, few Curry leaves, ½ Tablespoon Butter, 1 teaspoon Red chili powder, ¼ teaspoon Asafetida, To taste Salt
- Mix it well incorporating all the ingredients with your fingers. Now sprinkle water very slowly and make a stiff thattai dough. Use the saved water from cooking lentils (if you have any).
- Cover the dough with a kitchen cloth until we heat oil to deep fry the kara kara mini thattais.
- Since these mini thattais are a little time-consuming to shape (and we make a ton of them since they are tiny), I like to shape enough to fry for a couple of batches before I start frying.
Shaping the button thattai
- Make small balls from the thattai dough.
- Layer a piece of parchment paper or a thick plastic paper on the countertop. Place the shaped balls on them leaving enough space between the balls to spread.
- Now place another piece of parchment paper (or plastic) on top of the shaped balls.
- Use a small flat bowl to gently press on each ball to flatten them. Make sure to flatten them evenly on all sides and also try to keep them the same size and thickness. I like it not too thin and not too thick.
- Repeat with all the balls on the sheet and then slowly transfer the shaped thattai discs onto a clean kitchen cloth. I like using dhoti cloth/veshti to place the thattai disc.
- Air drying them for a few minutes helps take the extra moisture from the dough and in turn the thattais comes out crispy and also absorbs less oil when frying.
- Make 3 or 4 batches of thattai discs before beginning to fry them.
Frying the mini thattais
- When the oil is hot, reduce the heat to medium and then slowly start sliding the shaped discs into the oil. Depending on the size of the frying pan, add about 8 to 10 mini thattais into the oil. Do not overcrowd.Oil
- Make sure to fry them on medium heat until the button thattais are golden brown on both sides.
- Remove the kara kara thattai on a paper towel-lined bowl.
- Let them cool well before transferring to an airtight container.



Usha Rao says
Adding cooked dal is an interesting twist. i made this recipe few days ago with a minor change. I didn't make them mini but regular size. The taste was excellent!
Sandhya Ramakrishnan says
Thank you Usha. Yes, they can be made as regular thattai too. In fact I find making them larger easier than making mini ones.
Srividhya Gopalakrishnan says
Adding the cooked dal is a great idea. Man, but you have a lot of patience to press these mini thattai and deep-fry them. Kudos to that effort. 🙂